The SD-Dev Carrier Board
The Signaloid SD-Dev is a compact carrier board and development system for testing and characterizing the Signaloid C0-microSD. It has an open-top microSD socket so you can probe the C0-microSD debug pads, and it can measure and programmatically power-cycle the modules it hosts.
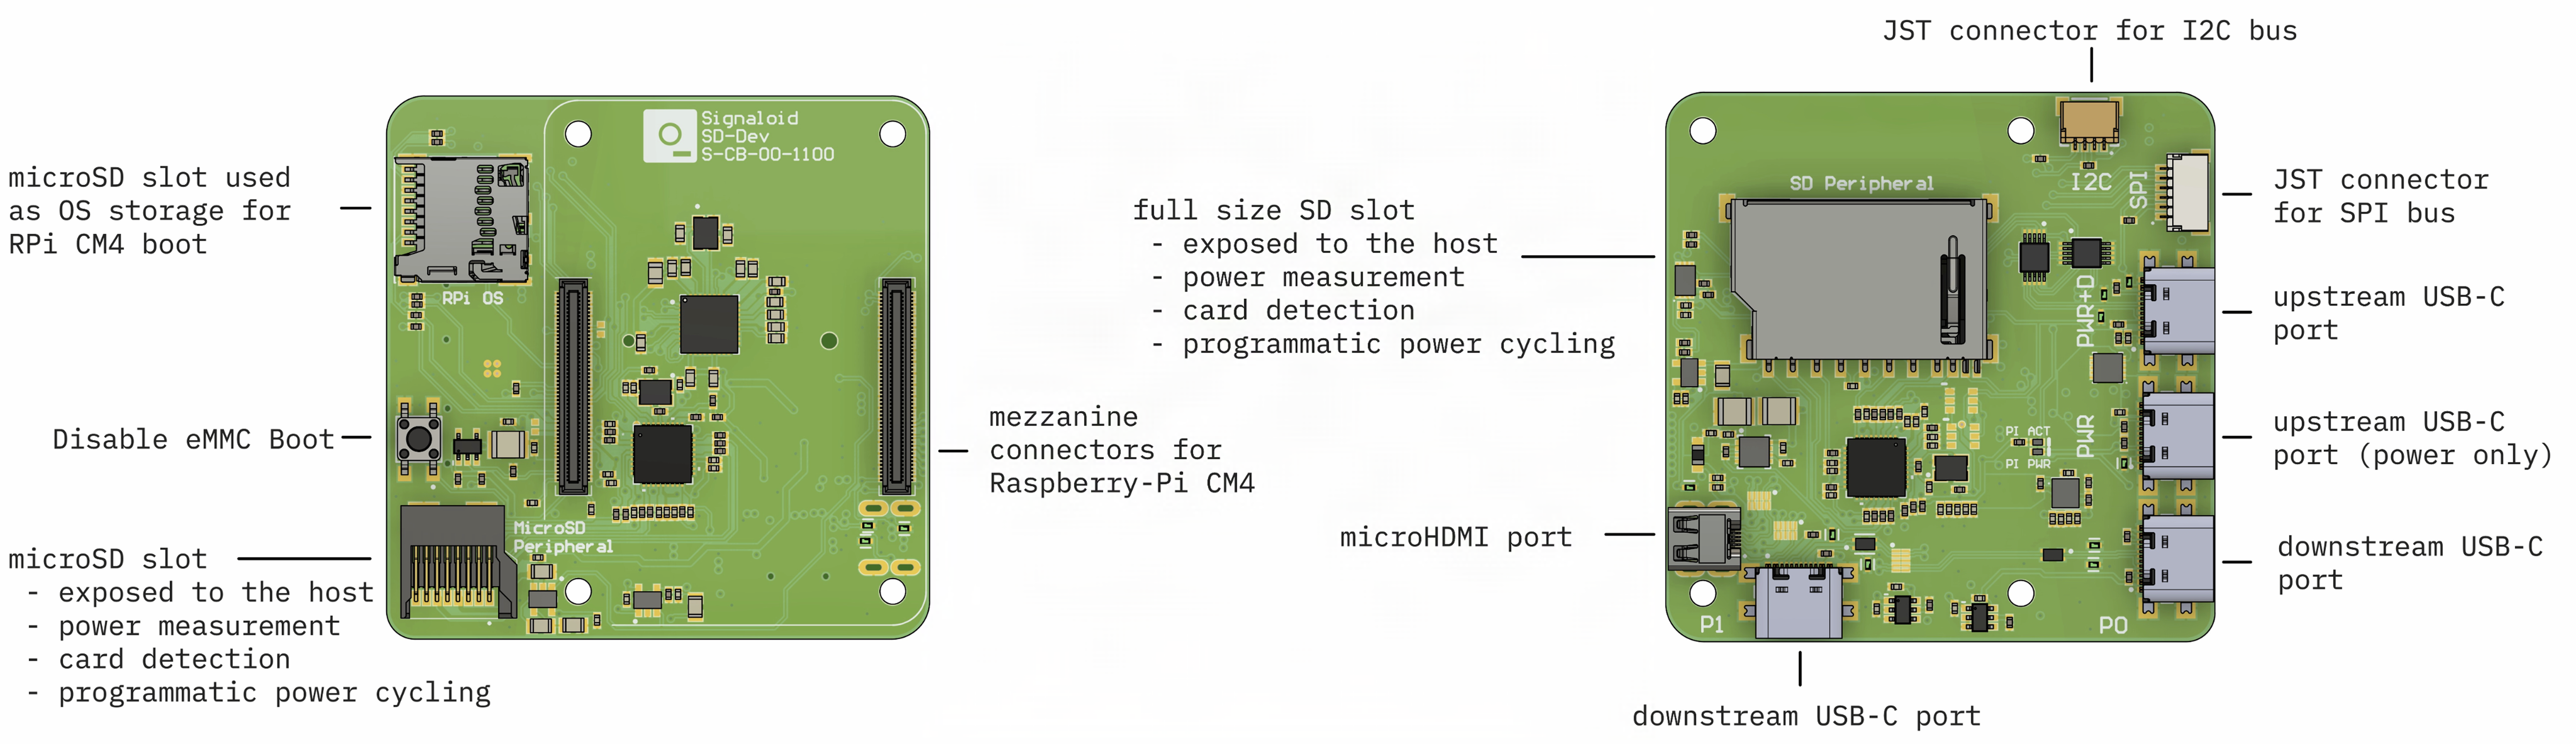
Operating modes
Peripheral mode
Connected to a host computer over USB, the SD-Dev acts as a generic USB-to-SD adapter, exposing one microSD slot and one full-size SD slot to the host.
Without an on-board Raspberry Pi compute module, power the SD-Dev through the PWR+D port.
Standalone mode
Attach a Raspberry Pi CM4 or CM5 to the carrier board to produce a compact single-board computer with hot-swappable FPGA modules. In this mode the board provides power measurement and programmatic power cycling for the on-board modules.
With an on-board Raspberry Pi compute module, power the SD-Dev through the PWR port so the
P0 and P1 ports remain free for connecting peripherals to the compute module.
Specifications
- Board outline: 57 mm × 57 mm
- 2 × USB Type-C downstream ports
- 1 × USB Type-C upstream port
- 1 × USB Type-C upstream power-only port
- 1 × Micro HDMI port
- JST connectors for SPI and I²C peripherals
- One full-size SD slot and one microSD slot (for C0-microSD boards or regular SD cards), with:
- SD card detection
- programmable power cycling
- power measurement
- open-top microSD socket for probing the C0-microSD debug pads
- Dual function: peripheral and standalone modes
The SD_Dev_toolkit.py and
SD_Dev_power_measure.py scripts (in the Signaloid-Compute-Module-Utilities repository) drive power cycling
and power measurement.
Flashing the Raspberry Pi Compute Module eMMC
To flash the on-board eMMC of a compute module, follow the official Raspberry Pi documentation. The SD-Dev has no disable eMMC Boot jumper. Instead, press and hold the on-board push button before connecting the SD-Dev to the host, then continue with the flashing process.
Raspberry Pi Compute Module as a USB gadget
In standalone mode you can configure the attached Raspberry Pi as a USB serial or USB Ethernet gadget, so one USB-C cable gives you a console or SSH access. See the Raspberry Pi CM USB gadget guide.
Getting started
For the full walkthrough, see the SD-Dev quickstart guide.
Next steps
- Raspberry Pi CM USB gadget (SD-Dev), reaching the on-board compute module over a single USB cable in standalone mode.
- C0-microSD, the module that the carrier board hosts, probes, and power-cycles.
- Identify your module, finding the device path of a module seated in the carrier.